# Quantity Breaks Discount on Lumin Theme
### **Guide: Setting Up a Quantity Breaks block for Lumin themes**
Quantity breaks allow you to offer discounts for buying multiple quantities of the same product. For example:
* Buy 2-4 items: 10% off
* Buy 5-9 items: 15% off
* Buy 10+ items: 20% off
This feature enhances sales by encouraging customers to purchase more.
{% embed url="" %}
### **Step 1: Adding Quantity Breaks block on LuminTheme**
Lumin themes natively offer quantity break functionality, This guide is a step by step guide to setup quantity breaks block on any Lumin theme.
#### **Steps:**
1. Go to the **Product page > Product Information Section**.
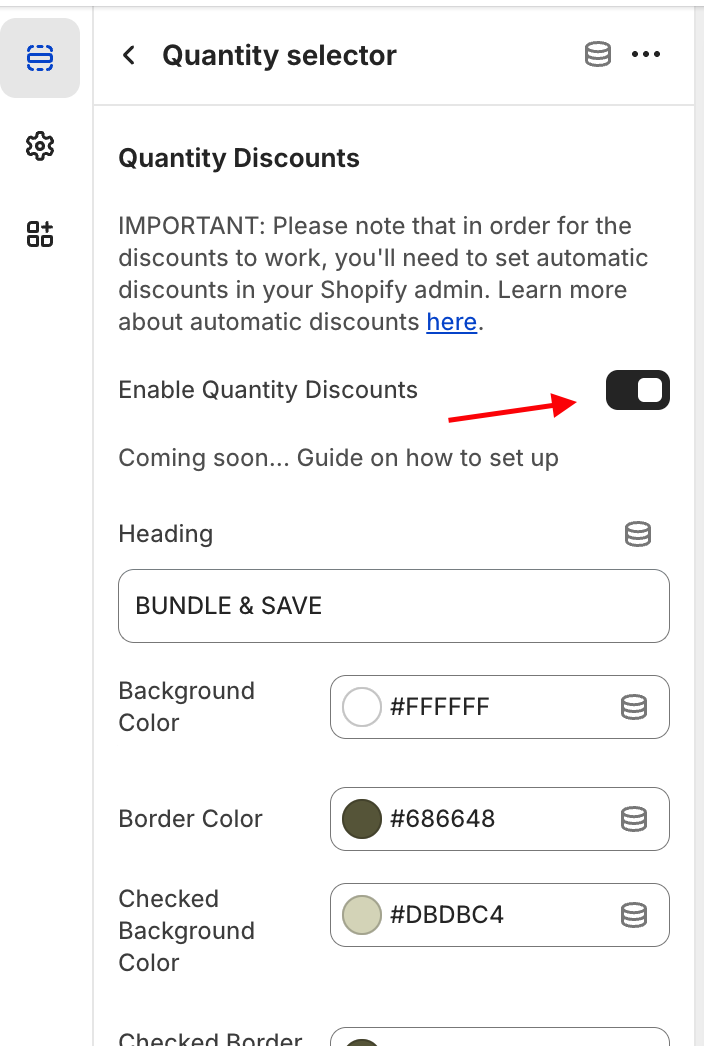
2. Add new block in ‘Product Information’ section Search for "Quantity Selector" 
3. Enable Quantity Discount
4. Configure an app based on your preferences.
 
### **Step 2: Manual Setup for Quantity Breaks**
###
### **Guide: Preselected Options and Badge Display for Quantity Breaks**
#### **Understand the Features**
* **Preselected Option**: Automatically highlights a default quantity break tier when customers view a product, helping them understand the most popular or advantageous discount.
* **Badge Display**: Shows a visual indicator (e.g., "Best Deal!" “Most Popular”) near specific discount tiers to draw attention.

### **Step:3 Setup Quantity Options**
### **Setting Up Label, Caption, Quantity, and Extra Fields in Shopify**
### **Understanding the Features**
1. **Quantity**: Allows customers to select the number of items they wish to purchase.
2. **Label**: Text that identifies a field or section (e.g., "Quantity" or "Custom Message").
3. **Caption**: A short description or additional information displayed below a label to provide context.
4. **Discount type**: Shopify offers several types of discounts that can be applied to quantity breaks, Here are the key discount types:
5. **Percentage Discount**\
A discount that reduces the price by a percentage (e.g., 20% off).\
\&#xNAN;*Example*: "Get 20% off all items!"
6. **Fixed Amount Discount**\
A specific dollar amount is subtracted from the total price (e.g., $10 off).\
\&#xNAN;*Example*: "Save $10 on orders over $50!"
7. **Free Shipping Discount**\
Eliminates shipping costs for eligible orders.\
\&#xNAN;*Example*: "Free shipping on orders over $75!"
8. **Buy X Get Y Discount (BOGO)**\
Offers a free or discounted product when a certain quantity is purchased.\
\&#xNAN;*Example*: "Buy 2, Get 1 Free!"

###
###
###
### **Step:4 Setup Automatic discount in Shopify**
Here’s a step-by-step guide to set up an **automatic discount** in Shopify for a **Buy 2 Get 20% Off** promotion.
### **Step 1: Access the Discounts Section**
1. Log in to your Shopify Admin panel.
2. Navigate to **Discounts** from the left-hand menu.

### **Step 2: Create an Automatic Discount**
1. Click **Create Discount** and select **Automatic Discount**.
2. In the **Automatic Discount** setup page, configure the following:

#### **Step 3: Configure the Discount Details**
1. **Name the Discount**
* Enter a name like "Buy 2 Get 20% Off" for easy identification.
2. **Select the Discount Type**
* Choose **Percentage Discount**.
3. **Set the Discount Value**
* Enter **20%** in the discount value field.

#### **Step 4: Define the Discount Conditions**
1. **Applies To**
* Choose what the discount applies to:
* **Specific Products**: Select products eligible for the discount.
* **Specific Collections**: Select a collection if the discount applies to a group of products.
* **Entire Order**: Apply the discount to all products.
2. **Minimum Requirements**
* Select **Minimum Quantity of Items**.
* Enter **2** as the minimum number of items required to trigger the discount.
#### **Step 5: Set the Active Dates**
1. **Start Date**: Select the date and time for the discount to start.
2. **End Date (Optional)**: If it’s a limited-time offer, set an end date.
### **Step 6: Save and Test the Discount**
1. Click **Save** to activate the automatic discount.
2. Test the discount:
* Add two eligible items to the cart.
* Go to checkout and verify that 20% off is applied automatically.
### **Step 7: Promote Your Discount**
1. **Highlight on Product Pages**: Add a banner or text like “Buy 2 and Get 20% Off!”
2. **Homepage Announcement**: Use a storewide banner to advertise the promotion.
3. **Email Marketing**: Notify your subscribers about the deal.
4. **Social Media**: Share posts with visuals to attract attention.
### **Tips for Success**
* **Combine with Other Offers**: Highlight this discount alongside free shipping if applicable.
* **Upsell Opportunities**: Encourage customers to buy more by suggesting complementary items.
### **Step 5: Test Your Updates**
1. **Preview Changes**
* Open a product page and ensure the preselected option and badge display correctly.
2. **Test Responsiveness**
* Check the appearance on desktop and mobile devices.
3. **Check Functionality**
* Ensure the preselected option works seamlessly during checkout.
### **Step 6: Highlight the Features**
Promote these enhancements to encourage bulk purchases:
1. **Update Product Descriptions**: Mention the default tier and its benefits.
2. **Use Store Announcements**: Add a banner like “Save More with Bulk Discounts!”.
3. **Send Email Campaigns**: Showcase the benefits of the "Most Popular" or "Best Deal" tiers.
---
# Agent Instructions: Querying This Documentation
If you need additional information that is not directly available in this page, you can query the documentation dynamically by asking a question.
Perform an HTTP GET request on the current page URL with the `ask` query parameter:
```
GET https://help.lumintheme.com/lumin-theme-documentation/quantity-breaks-discount-on-lumin-theme.md?ask=
```
The question should be specific, self-contained, and written in natural language.
The response will contain a direct answer to the question and relevant excerpts and sources from the documentation.
Use this mechanism when the answer is not explicitly present in the current page, you need clarification or additional context, or you want to retrieve related documentation sections.